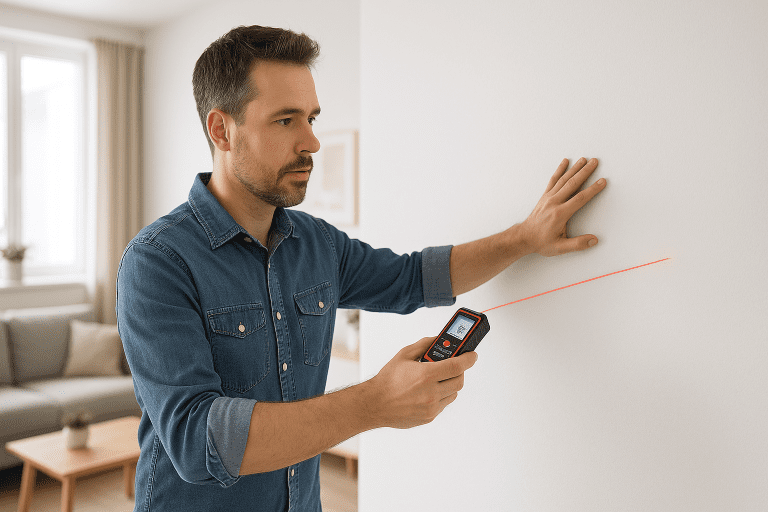
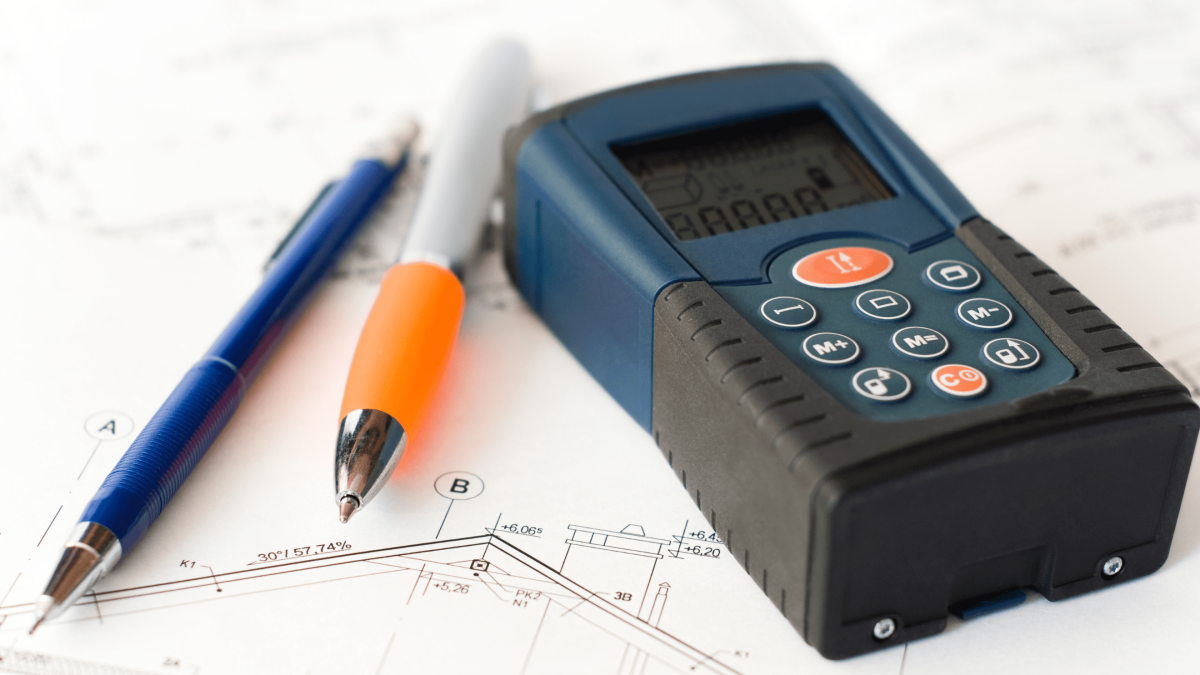
A laser meter measures distance using a focused beam of light and electronic timing. Pointing the device at a surface and triggering the laser generates an immediate, precise reading on a digital display.
Unlike a tape measure, a laser meter can cover long spans—up to 200 meters—with millimeter-level accuracy. This unparalleled speed and range make it an indispensable tool for contractors, surveyors, architects, interior designers, engineers, and DIY homeowners, instilling confidence in their efficiency.
The remainder of this article serves as a practical guide, explaining the underlying principles of laser measurement, comparing laser meters with traditional tools, and providing comprehensive guidance on setup, use, and selection to support your learning process.
How a Laser Meter Works ?
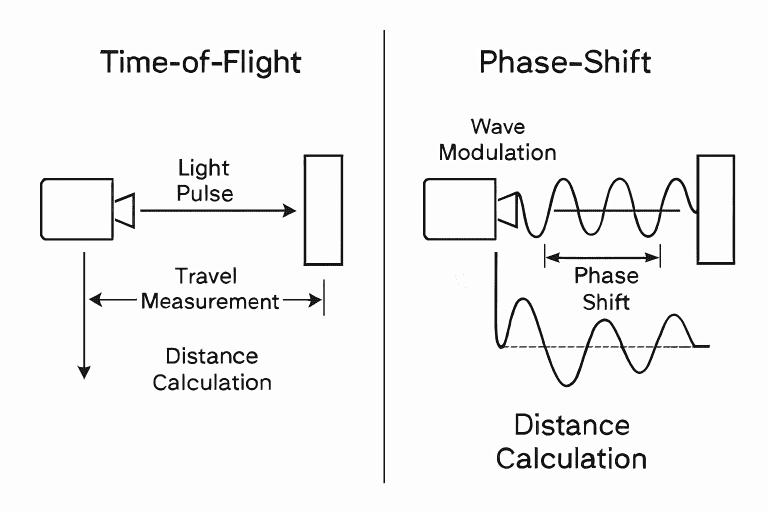
A laser meter measures distance by timing a light pulse. It sends a laser beam to a surface. When the beam reflects, the meter notes how long it took. The device then calculates distance using the speed of light.
Key parts of a laser meter:
Measurement Methods:
Time-of-Flight Method
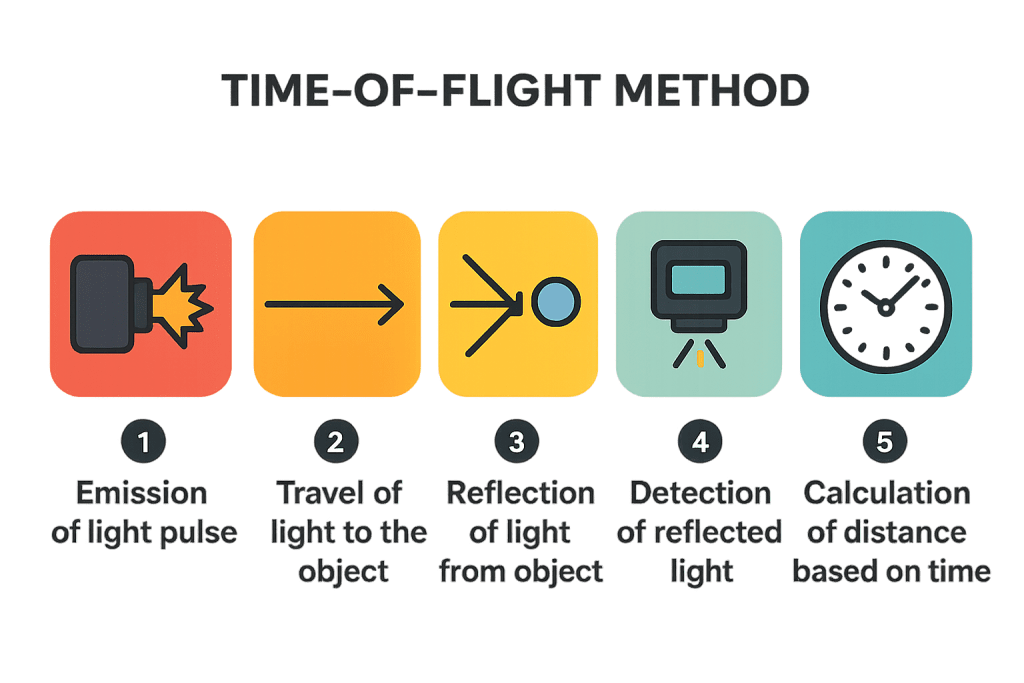
Time-of-Flight Measurement Steps
Phase-Shift Method
Laser Meter vs. Traditional Tools
Here’s a clear comparison of key features for laser meters, tape measures, and ultrasonic devices.
Feature | Laser Meter | Time Slots | Ultrasonic Meter |
|---|---|---|---|
Accuracy | ±1–3 mm | ±1–5 mm | ±5–10 mm |
Range | Up to 200 m | Up to 8 m | Up to 10 m |
Speed | Instant readings | Manual pull-and-read | ~1 s per measurement |
Cost | $50–$500+ | $5–$30 | $30–$100 |
This table highlights why a laser meter often outperforms traditional tools in precision, range, and efficiency. Laser meters, with their ±1-3 mm accuracy, up to 200 m range, and instant readings, clearly outshine tape measures and ultrasonic meters in most measurement scenarios.
Step-by-Step Guide to Using a Laser Meter
Real Customer Scenarios and Applications
An architect measures vaulted ceiling heights to ensure ductwork fits precisely. A surveyor maps property boundaries quickly, using a phase-shift meter for high accuracy. A DIY homeowner checks wall-to-wall distances in a kitchen remodel, cutting paint and flooring waste. An interior designer calculates room volumes to size HVAC units and select furniture layouts. An engineer verifies bridge component spacing on-site, reducing rework and safety risks.
Cost Breakdown of Laser Meters
Tier | Price Range | Key Features | deal User |
|---|---|---|---|
Entry-Level | $50–$100 | Up to 30 m range, basic accuracy | DIY homeowners |
Mid-Range | $100–$250 | 50–100 m range ±2 mm, area/volume | Contractors, designers |
Professional | $250–$500+ | 200 m+ range ±1 mm, Bluetooth, tilt sensor | Surveyors, engineers |
If your projects extend beyond basic DIY measuring, explore our guide to the best handheld laser meters for contractors ngineered to handle heavy jobsite demands with reinforced rubber bumpers and IP65-rated dust and water resistance.
Eligibility Checklist: Choosing the Right Laser Meter
Timeline Expectations for Measurement Projects
Planning measurement needs usually takes one to two days, as you define accuracy and range requirements and choose the proper meter. Measurement itself can range from a few hours for small rooms to several days on large sites. Finally, verification and data integration—importing readings into CAD or BIM—often adds another day. Using a laser meter can reduce total measurement time by 30–50% compared to manual methods, thereby speeding up project delivery and minimizing rework.
Alternative Options and Comparisons
Option | Pros | Cons |
|---|---|---|
Smartphone Apps | Low cost convenient | Limited range, less precise |
Optical Rangefinders | No batteries, simple optics | Manual angle reading has lower accuracy |
Ultrasonic Meters | Affordable moderate range | Affected by the surface material |
Expert Tips from Industry Professionals
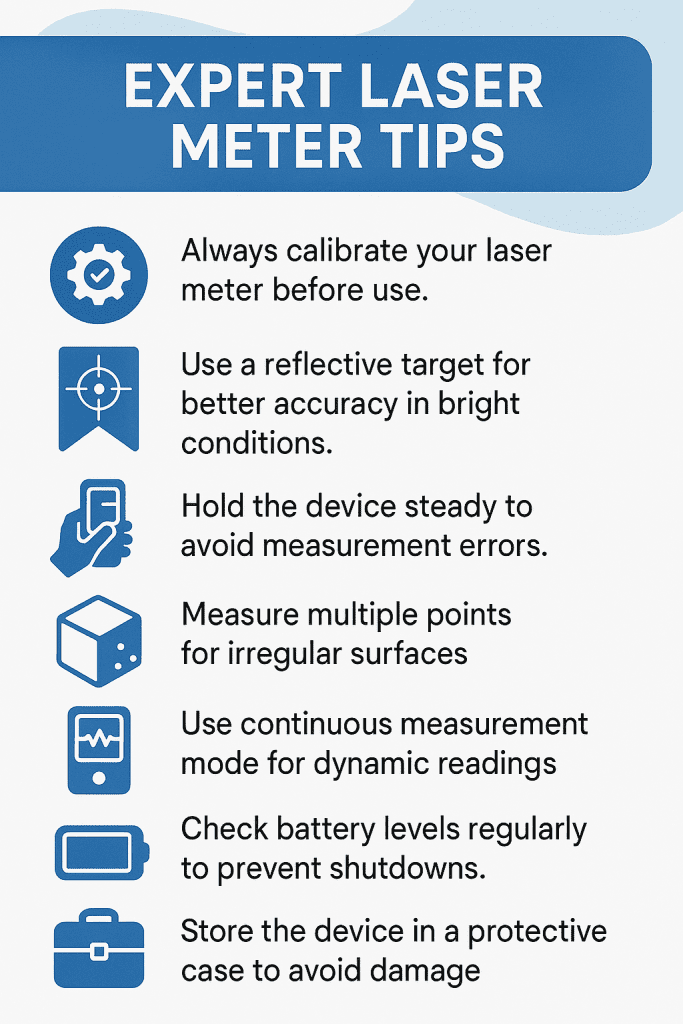
Expert Tips for Laser Meter Use
Common Mistakes to Avoid with Laser Meters
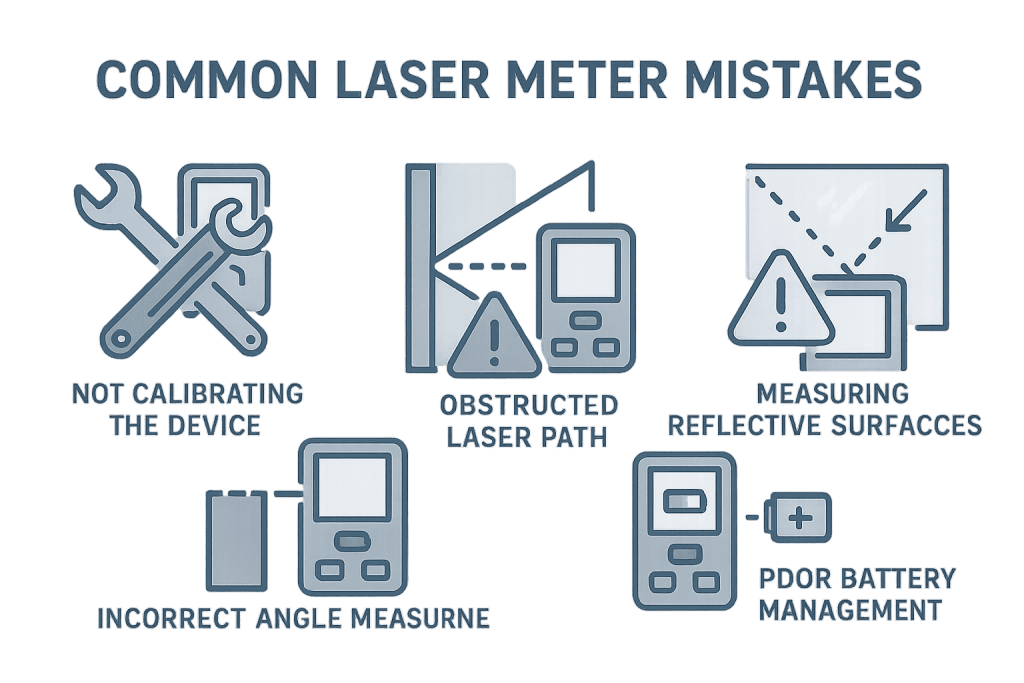
Common Laser Meter Mistakes
Conclusion
A laser meter delivers unmatched speed and millimeter accuracy using light pulses. The step-by-step guide ensures you capture reliable readings every time. Use the cost breakdown and checklist to select the ideal model for your tasks.
Keep the lens clean and use reflective target plates to maintain accuracy. Avoid angled shots and skip no calibrations to minimize errors.
With the proper laser meter, you’ll save time, cut mistakes, and achieve professional-grade measurement results on any project.