Want to measure a room fast? A laser tape measure does it in seconds. This tool changes how you measure distances. It beats traditional tape measures for speed and accuracy.
Let me show you how to use a laser tape measure. You’ll learn setup, basic measuring, and advanced tricks. By the end, you’ll measure like a pro. No more struggles with long tape measures or second person needed.
What Is a Laser Tape Measure?
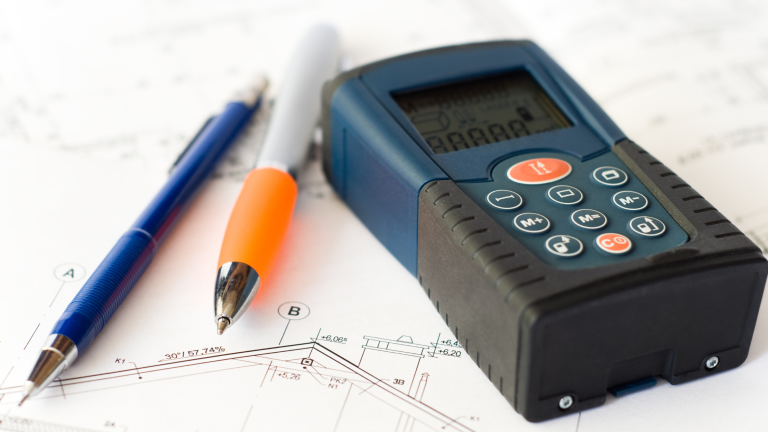
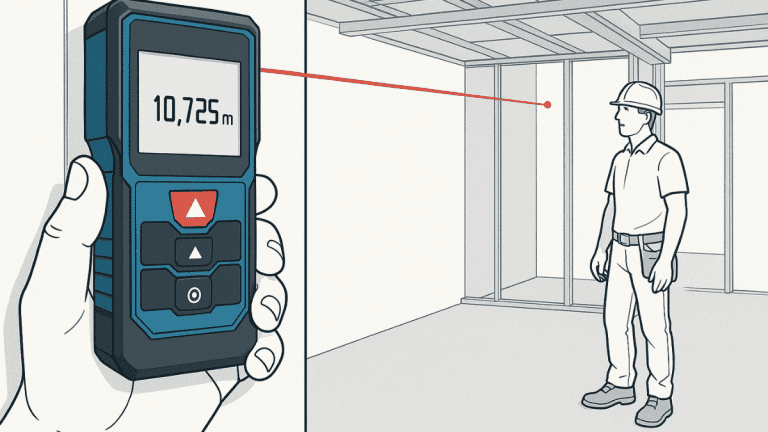
A laser tape measure is a digital measuring tool. It uses a laser beam to calculate distances. Point it at a wall. Press the button. Get your reading instantly.
Think of it as a digital distance measurement device that fits in your pocket. Instead of pulling out a long tape, you just aim and click.
Most laser tape measures are about the size of a phone. They run on AA or AAA batteries. The display shows your measurement in big, clear numbers.
Here’s what makes this laser measuring device special:
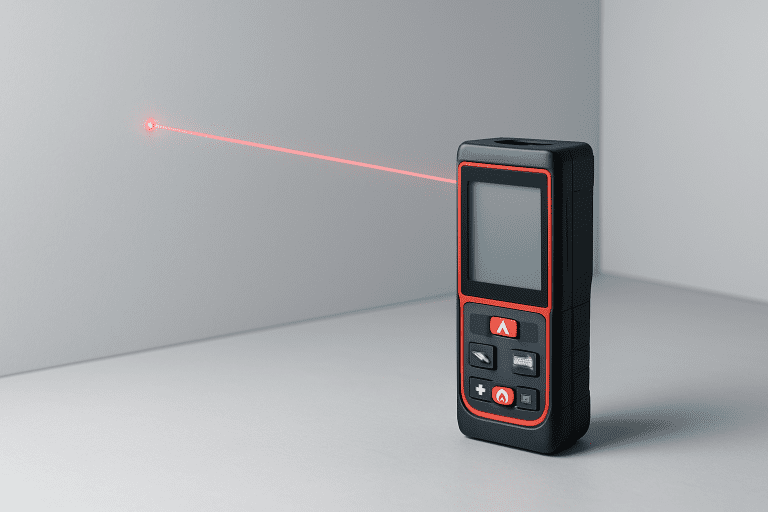
The laser technology inside sends a beam to your target. The beam bounces back. The device counts the time it takes. This tells it the exact distance.
You can measure anything. Wall to wall. Floor to ceiling. Across the room. Even outside to distant objects. No ladders needed for heights.
How Laser Tape Measure Works?
Understanding how a laser tape measure works helps you use it better. Don’t worry. The science is simple.
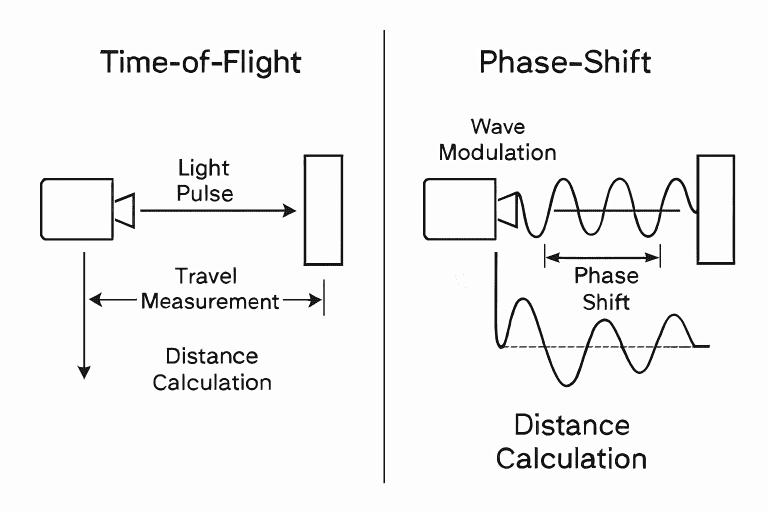
Two main technologies power these tools: phase-shift and time-of-flight.
Most home and DIY models use phase-shift. This method compares the laser beam that left with the beam that returned. The difference tells the distance.
Think of it like an echo. You yell across a canyon. The sound comes back. You time how long it takes. That tells you how far the canyon is.
Here’s the process step by step:
Step 1: Laser Fires Your device sends a laser beam to the target.
Step 2: Beam Reflects The beam bounces off the wall or object.
Step 3: Beam Returns The reflected light comes back to the device.
Step 4: Device Calculates Electronics inside measure the time or phase difference.
Step 5: Math Happens Using the speed of light, the device does the math.
Step 6: Display Shows Result Your measurement appears on screen instantly.
The whole thing takes less than a second.
This is why a laser measuring device stays accurate over long distances. A metal tape sags and bends. Your laser stays straight and true. No human error. No sagging.
Most laser tape measures are accurate to within plus or minus 1/16 inch. Some are even more precise. That beats traditional tape measures every time.
Getting Started: Your First Time Setup
Before you use a laser tape measure, do basic setup. It only takes a minute.
Install Your Batteries
Open the battery compartment. Usually on the back or bottom. Pop in AA or AAA batteries. Match the positive and negative ends to the markings inside. Close the compartment tight.
Power It On
Find the power button. Usually red or clearly marked. Press it. The display should light up.
Select Your Measurement Units
Look at the display. There should be a button to change units. You can measure in feet and inches. Or meters and centimeters. Pick what you use most.
Set Your Reference Point
This is important. Your device can measure from the front edge or back edge. The front edge is where the laser comes from. The back edge is the other end of the device.
For most work, use the front edge. It’s easier and more natural. But if you’re measuring into a corner, the back edge works better.
Most devices let you toggle between front and back. Check the manual or look for a button labeled “Mode” or “Ref.”
Test on a Known Distance
Now test it. Measure a door frame. Or window. You probably know these sizes. My door is 36 inches wide. Let me measure it to check accuracy.
If your laser tape measure reads within 1/8 inch, you’re good. If it’s way off, recalibrate. Check your manual for how to do this.
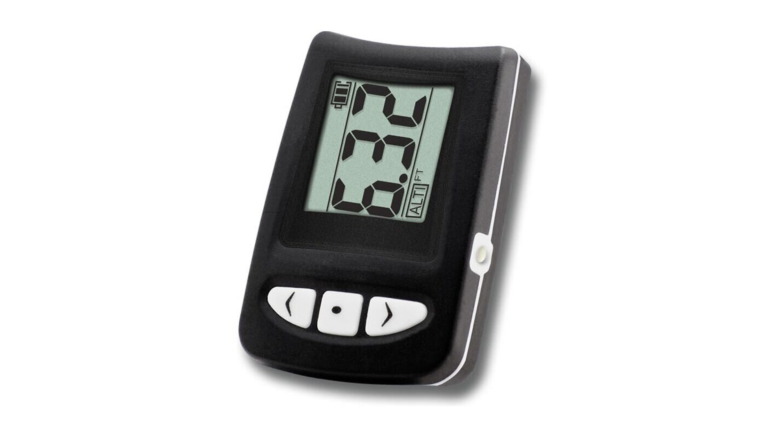
Understand the Display
Look at what your screen shows. There’s a main number. That’s your distance. There might be smaller numbers too. These often show repeating measurements or totals if you measured multiple times.
An icon might show if you’re in area mode or distance mode. Look for little pictures to guide you.
Now you’re ready to measure.
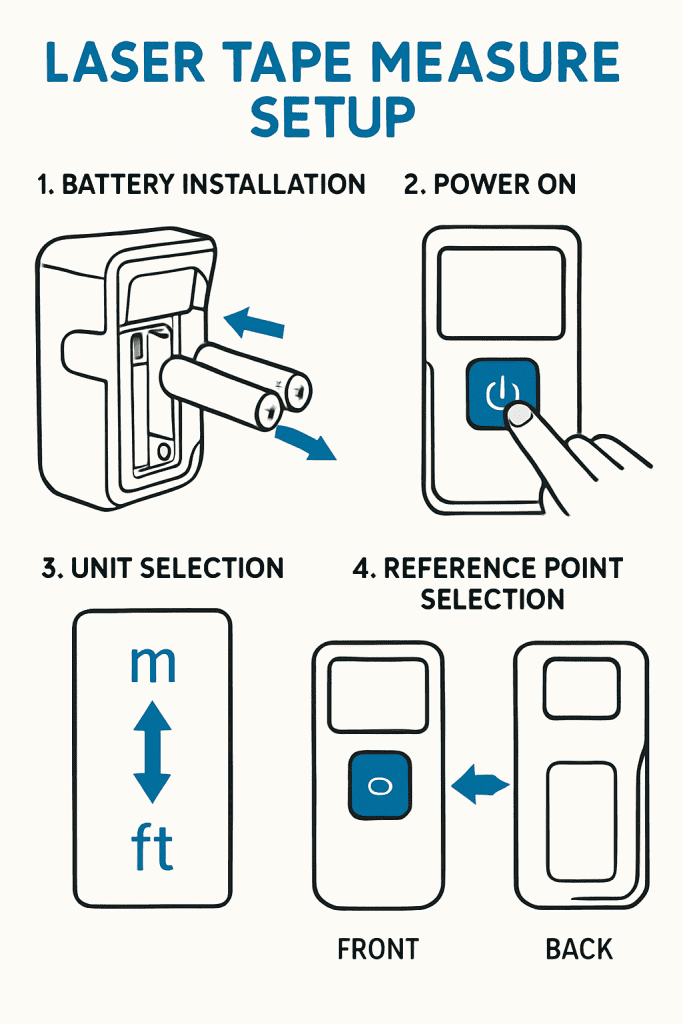
Step-by-step setup guide for laser tape measure including batteries, power button, unit selection
How to Take Basic Distance Measurements
This is the core skill. Measure a single distance from point A to point B.
Position Yourself
Stand at your starting point. The place you want to measure from. Hold the device flat and level. Don’t tilt it up or down.
Aim at Your Target
You’ll see a laser dot. Point it at what you’re measuring to. Could be a wall. Could be a doorway. Could be an object across the room.
Keep the laser dot visible and steady.
Hold Steady
This matters. Movement changes your reading. Hold your arm still. Brace yourself against a wall if you need to. Take a breath. Hold it while measuring.
For long distances (over 50 feet), use a tripod. Your hands will shake. A tripod keeps everything rock solid.
Press the Measure Button
Usually red or labeled “MEAS.” Give it a firm press. Not too hard. Just a normal click.
Wait for Confirmation
Most devices beep. Some flash a light. This means the laser found the target and calculated distance.
Read Your Measurement
Look at the display. That number is your distance. Write it down or snap a picture if you’ll need it later.
Try Again if Needed
If you got “Error” on the screen, try once more. Make sure you’re aiming at a solid surface. Dark or very shiny surfaces sometimes cause issues.
Pro Tips for Better Results
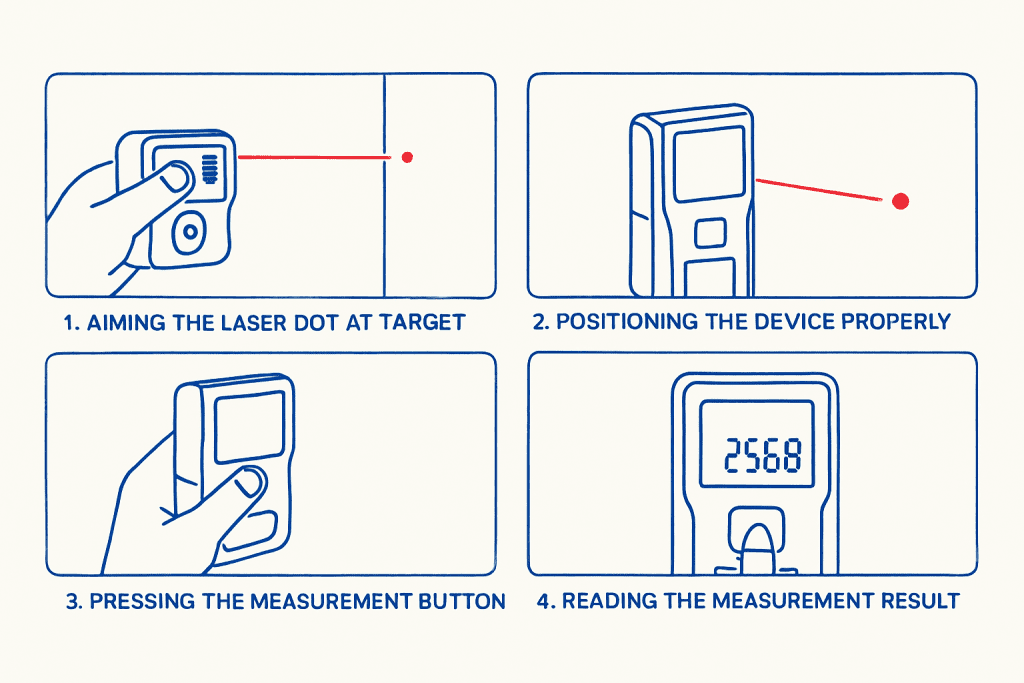
Laser tape measure measurement steps from positioning device to reading distance result
Advanced Features: Area, Volume, and Pythagorean Mode
Once you master basic distance measurement, try advanced modes. These save tons of time on bigger projects.
Area Mode: Calculate Square Feet
Say you’re buying flooring. You need to know room size in square feet.
- Select “Area” mode (often marked with a square icon)
- Measure the length of the room
- Measure the width of the room
- Your device multiplies them automatically
- You get square footage instantly
No calculator needed. No math mistakes.
Example: Room is 12 feet long and 10 feet wide. Area mode shows 120 square feet. That’s how much flooring you need.
Volume Mode: Calculate Cubic Feet
Need to know room volume for HVAC or ventilation?
- Select “Volume” mode (often a cube icon)
- Measure length
- Measure width
- Measure height
- Device calculates total cubic feet
This tells you air volume. Helps pick the right fan. Or calculate heating needs.
Pythagorean Mode: Measure Heights You Can’t Reach
This is genius. You can measure any height without a ladder.
Say your ceiling is 12 feet high. You can’t reach it. So measure the distance from corner to where the wall meets ceiling. Use Pythagorean math. Your device calculates the exact height.
This works by creating an invisible right triangle. You measure two sides. Your device calculates the third side using geometry.
Steps:
- Stand at a known distance from the wall (like 10 feet away)
- Select “Pythagorean” or “Indirect” mode
- Measure to the base of the wall (should be your distance)
- Measure to the top of what you’re measuring
- Device shows the height
Real uses:
Measuring Different Rooms and Spaces
Here’s where this skill gets practical. Real projects in real rooms.
Living Room: Flooring Project
Planning new carpet or hardwood? Your laser tape measure makes it easy.
Takes 2 minutes. Traditional measuring takes 20.
Kitchen: Cabinet Installation
Installing new cabinets? Precision matters.
Everything aligns properly. No gaps or misalignments.
Bedroom: Paint Calculation
How much paint do you need?
Never buy too much or too little again.
Bathroom: Tile Installation
Bathroom tile needs exact measurements.
Tiles come in specific quantities. Getting measurements right saves money and hassle.
Outdoor: Deck or Patio Planning
Planning a new deck? Outdoor measuring is different.
This guides your material order perfectly.
Real Estate: Property Documentation
Agents and appraisers love these devices.
Takes minutes instead of hours. Much more accurate than guessing.
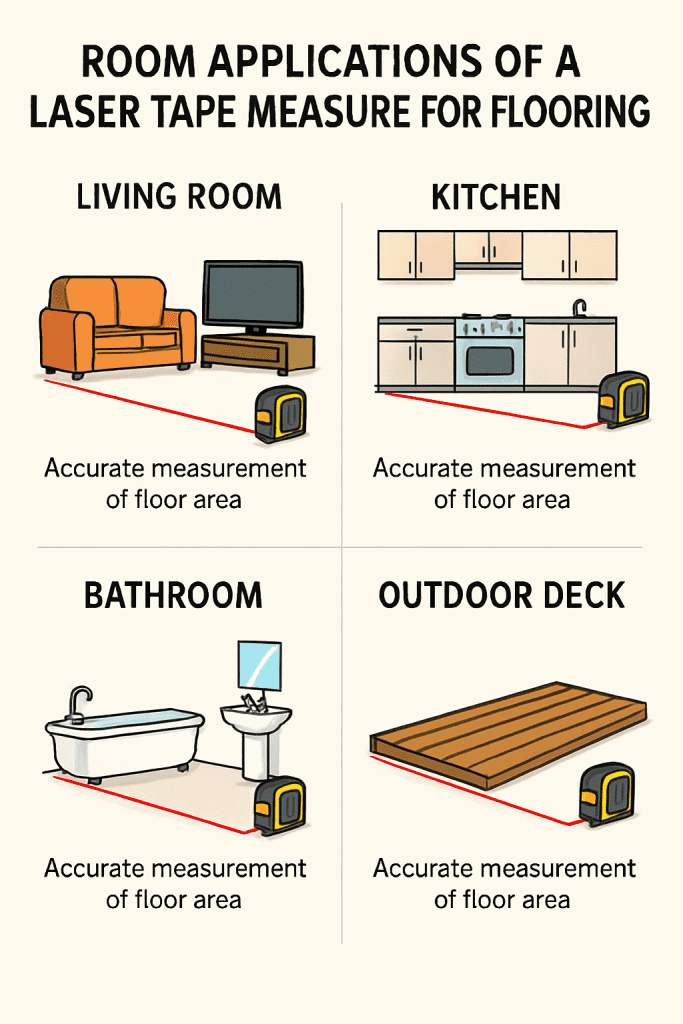
Laser tape measure applications for measuring living room flooring, kitchen cabinets, bathroom tile, outdoor deck, real estate
Tips for Accurate Measurements Every Time
Want perfect results? Follow these tricks. They make your measurements reliable every single time.
Indoor Environment Tips
Technique Improvements
Device Management
Outdoor Measurement Strategies
Surface-Specific Guidance
Light-colored walls: Best results. Laser reflects cleanly.
Dark walls: Use reflective target plate. Dark surfaces absorb laser.
Glass or mirrors: Laser passes through. Place target plate behind glass or measure adjacent surface.
Shiny surfaces: Scatter the laser beam. Aim at matte area instead.
Textured walls: May give different readings. Take multiple measurements and use the average.
Maintenance for Accuracy
Common Mistakes and How to Avoid Them
Learn from others’ errors. These mistakes happen all the time.
Mistake 1: Wrong Reference Point
You measure a room. It comes out 2 inches too long. What happened?
Your reference point was set wrong. Device length got added to your reading.
Fix: Always check if you’re using front edge or back edge. Most work uses front edge. Verify before critical measurements.
Mistake 2: Measuring at an Angle
You aim upward to measure ceiling height. Your reading seems too high.
Why? Angled laser measures the hypotenuse of a triangle, not straight distance.
Fix: Always hold device level to target. Or use Pythagorean mode for heights.
Mistake 3: Shaky Hands
You’re holding the device. Your hands move slightly. Reading jumps around.
Why? Even tiny movement changes where laser hits.
Fix: Use a tripod for anything over 50 feet. Rest against a wall for closer measurements. Take deep breath. Exhale as you measure.
Mistake 4: Wrong Surface Type
You measure a glass door. Device shows error. Won’t measure glass.
Why? Laser passes through glass instead of bouncing back.
Fix: Use reflective target plate on the other side. Or measure the wall beside the glass.
Mistake 5: Bright Sun Blindness
Outdoors in bright sun. You can’t see the laser dot at all.
Why? Sun overpowers the laser dot visibility.
Fix: Always use reflective target plate outside. Or move into shade. Some premium models have viewfinder screens to solve this.
Mistake 6: Not Clearing Between Measurements
You measure one room. Then measure another. Your second reading seems wrong.
Why? Previous measurement still loaded. Add/subtract mode still active.
Fix: Clear display between unrelated measurements. Power off and back on if confused.
Mistake 7: Low Batteries
Your measurements start being wildly wrong. One read says 10 feet. Next says 11 feet.
Why? Low battery voltage affects laser and processor.
Fix: Replace batteries at first warning sign. Carry spares always.
Mistake 8: Skipping Calibration
All your measurements seem slightly off now. You’re not sure what changed.
Why? Device drifts over time. Drops can cause this. Temperature changes too.
Fix: Test monthly against known distance. If off by more than 1/8 inch, get it serviced.
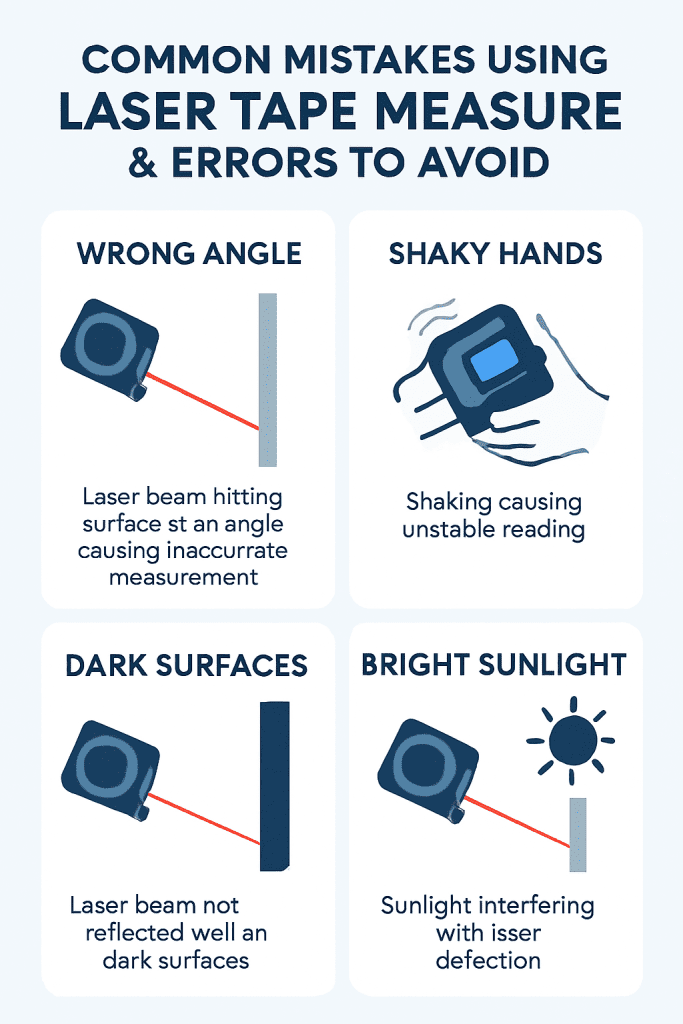
Common laser tape measure mistakes including angled measurements, hand movement, surface issues, and solutions
Troubleshooting Common Issues
Something isn’t working right? These solutions fix most problems.
No Power or Display Won’t Light
“Error” Message Appears
Wildly Inaccurate Readings
Can’t See Laser Dot
Inconsistent Readings
Safety Notes Throughout
Frequently Asked Questions
How accurate is a laser tape measure?
Most models measure within plus or minus 1/16 inch. Some premium versions get to plus or minus 1/32 inch. That’s more accurate than traditional tape measures, especially at distance.
Can I use it outside in sunlight?
Yes, but you’ll need a reflective target plate. Without it, bright sun makes the laser dot invisible. The target plate reflects the laser back so device can measure.
Do dark surfaces cause problems?
Dark colors absorb laser light. Your device might say “error.” Solution: Place a reflective target plate on the dark surface. Or measure to a lighter-colored object nearby.
What if I measure through glass?
Laser passes through glass instead of bouncing back. Measure won’t work. Put target plate on the far side of glass. Or measure the wall beside the glass.
How often should I calibrate?
Monthly is good. Test against a known distance. Doorway (36 inches) works great. If your reading is off by more than 1/8 inch, calibration is needed.
Can I measure ceiling height without a ladder?
Yes. Use Pythagorean mode. Stand known distance from wall. Measure to top of wall. Device calculates height using math. You stay safe on ground.
Why do I get different readings sometimes?
Hand movement during measurement is the main cause. Other factors: surface type, angle, low batteries, temperature. Solution: Use tripod. Take multiple readings. Average them.
Should I replace traditional tape measures?
No. Keep your regular tape too. Laser is faster for big areas. Traditional tape is better for marking cut lines and small objects.
How long do batteries last?
Usually 5,000 to 10,000 measurements on fresh AA or AAA batteries. Cold temperatures drain faster. Backlight use drains faster. Always carry spares.
What’s Class 2 laser mean?
Most consumer models use Class 2 lasers (under 1 milliwatt power). Your natural blink reflex protects eyes. It’s safe with normal use. Never stare directly into the laser.
Conclusion
You now know how to use a laser tape measure like a professional. You understand the basics. You’ve learned advanced features. You know common mistakes and how to avoid them.
Start simple. Measure a few rooms. Get comfortable with the device. Then try Pythagorean mode. Then area calculations.
Practice makes perfect. The more you use your laser measuring device, the faster and more accurate you become.
This tool will change how you approach projects. Measure quickly. Calculate accurately. Work confidently. Your DIY projects, home renovations, and construction work all get easier.
You’ve invested in a tool that pays for itself through time saved. No more hassles with long tape measures. No more second person needed. No more guessing on measurements.
Master your laser tape measure. Your projects will thank you.