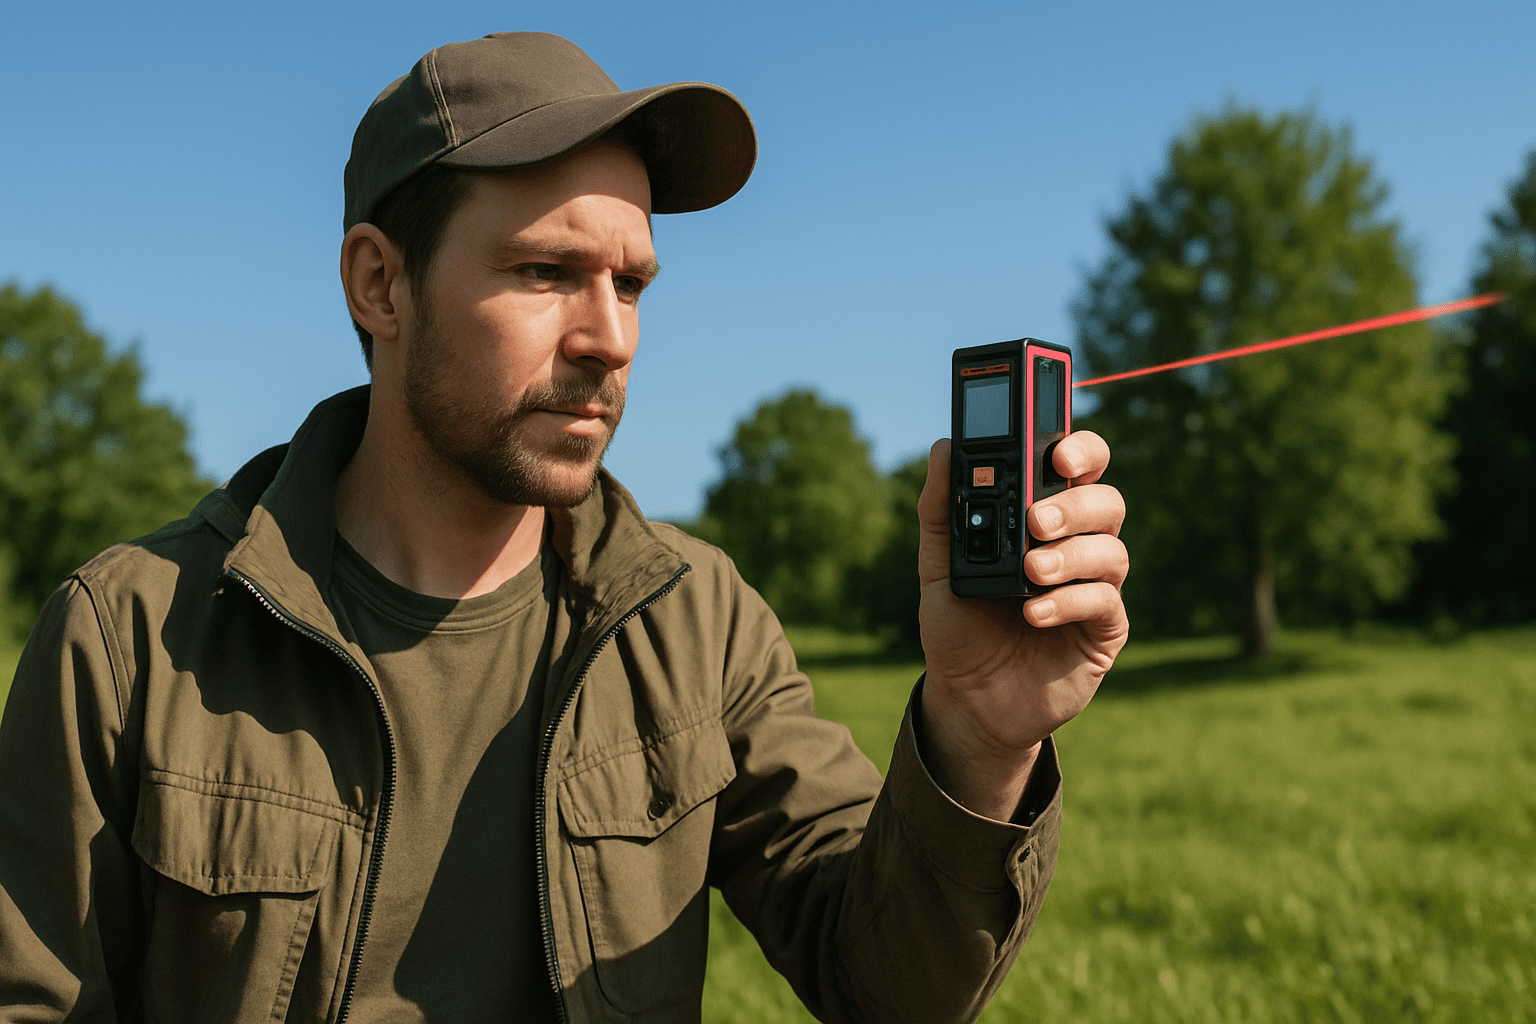
Measuring your property outdoors should be easy. But bright sun makes everything hard to see. Your laser distance measurer becomes useless. Or does it?
I’ll show you how to use a laser measure outside with confidence. You’ll learn tricks that make outdoor laser measurement work perfectly. Even in blazing sun. Even at long distances. Even on tough surfaces.
By the end, you’ll measure like a surveyor. No more guessing. No more second-guessing. Just fast, accurate outdoor measuring.
Why Outdoor Laser Measurement Is Different
Indoor measuring is simple. You aim your device. You see the red dot. You get your reading. Done.
Outdoor measuring is totally different. Sunlight washes out your laser beam. The dot disappears. Your laser tape measure shows “error” instead of distance. Frustrating, right?
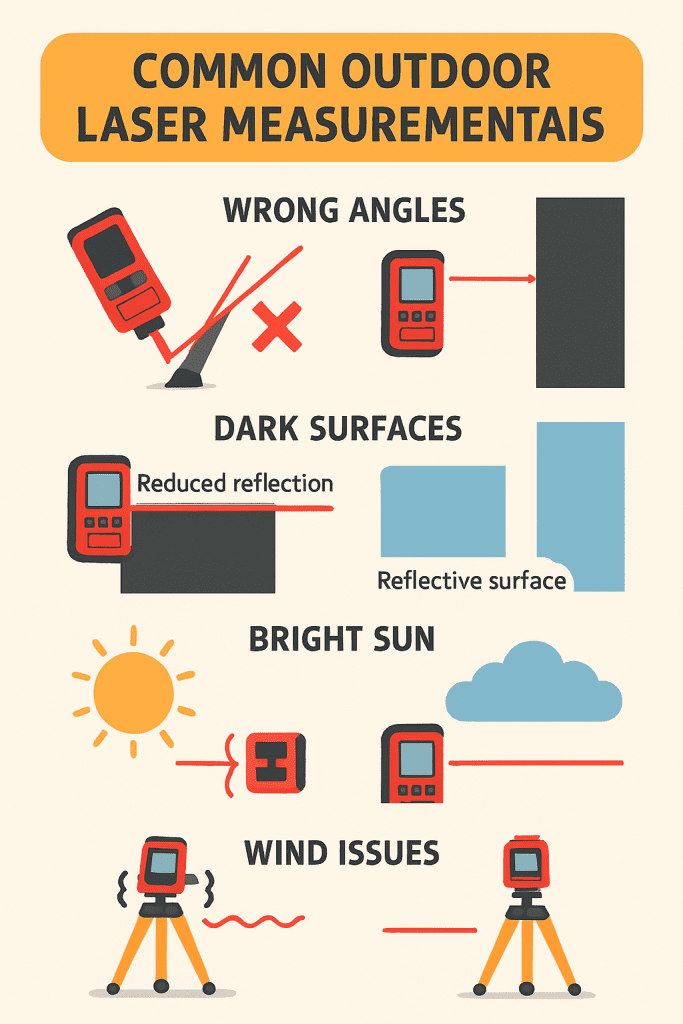
The issue isn’t your device. It’s the environment. Bright sun overpowers the laser. Reflective surfaces scatter the beam. Long distances are harder. Wind moves your equipment.
But here’s the good news. These problems have solutions. Once you know the tricks, outdoor laser measurement becomes easy. Even better than indoor measuring.
Your outdoor measuring accuracy improves. Your speed increases. Your confidence soars.
Let’s dive in.
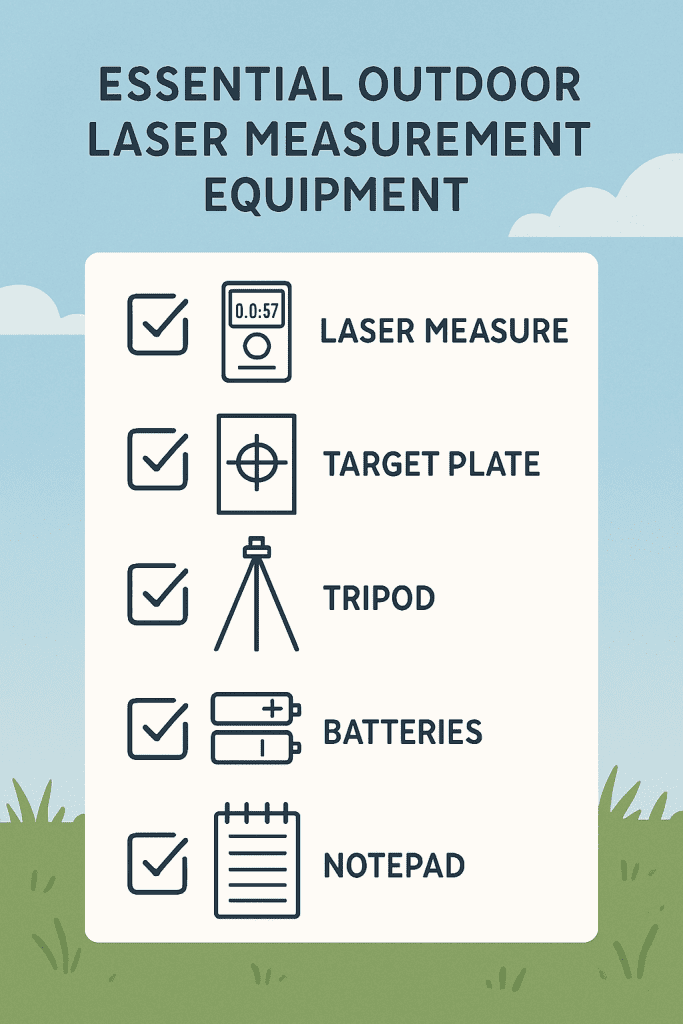
Essential Outdoor Equipment
Before you head outside, pack the right gear. Missing one item can ruin your whole day.
Your Laser Distance Measurer
This is your main tool. Most work indoors. Not all work great outdoors. Check your device manual. See if it’s rated for outdoor use.
Bring fresh batteries. Outdoor measuring drains power faster. Cold temperatures kill batteries quicker. Always have extras.
The Reflective Target Plate (Most Important)
This is your secret weapon. It’s a small, flat reflective surface. Usually white with red stripes. Costs about $10-15 online.
Why does it matter? Because it solves the sunlight problem. The target plate reflects your laser beam back to your device. Even in bright sun, your laser measurement works.
Don’t skip this. Buy a good one. It makes the difference between success and frustration.
A Tripod Mount
For measuring distances over 50 feet, a tripod is essential. Your hands shake. Even tiny movement ruins readings.
A tripod (about $20-40) holds your device steady. It frees your hands. You can set up and walk to the target. Your outdoor laser measurement stays rock solid.
Backup Measuring Tape
Bring a traditional 25-foot measuring tape. Use it to verify important readings. Double-check critical measurements. Peace of mind is worth carrying a tape.
Notepad and Pen
Record everything. Don’t trust memory. Write down measurements. Note the time. Record conditions. You’ll be glad you did.
Sunglasses
Seriously. Sunglasses help you see the laser dot better. Less glare. Better visibility. Easier outdoor laser measurement.
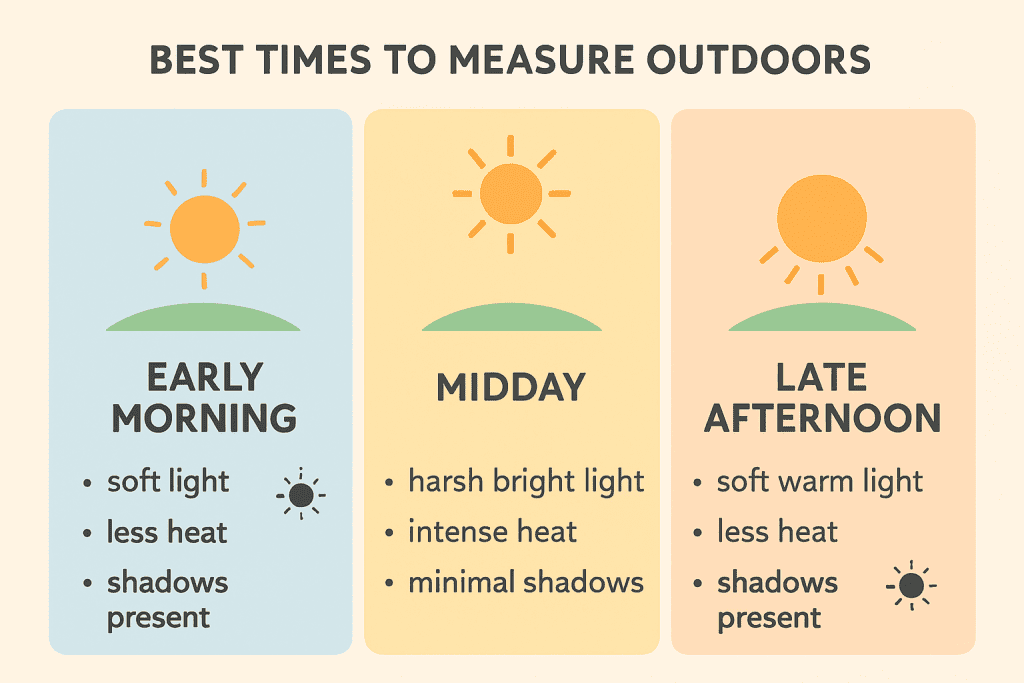
Best Times to Measure
Timing everything is critical for outdoor measuring accuracy. Pick the wrong time, and you’ll struggle.
Early morning is best. Six to eight AM works great. The sun is low. Your laser beam is visible. Shadows are your friend. Accurate readings come easily.
Late afternoon is also excellent. Four to six PM. Sun is low again. Laser dot glows brightly. Perfect for outdoor measuring.
Midday (ten AM to two PM) is your enemy. Sun is high overhead. Laser washes out. Measuring becomes nearly impossible. Avoid this time.
Cloudy or overcast days? Perfect. Clouds scatter sunlight evenly. No glare. No harsh shadows. Laser dot stays visible all day. These are ideal conditions for outdoor laser measurement.
Rain? Wait. Wet surfaces cause errors. Device might get damaged. Postpone your measuring.
Wind? Light wind is fine. Strong wind moves your equipment. Your target plate might shift. This causes bad readings.
Here’s the pattern: Choose early morning or late afternoon. Pick cloudy days if possible. Measure when conditions are calm. Your outdoor measuring accuracy improves dramatically.
The Target Plate: Your Most Important Tool
Understanding target plates makes outdoor laser measurement possible. Let me explain how to use one.
A target plate is a reflective surface. Usually small. Maybe six inches square. Mounts on a tripod. Bright white with red stripes (or bright colored bands).
Here’s how it works:
Your laser beam travels to the target. The reflective surface bounces the beam back. Your device catches the reflected light. It calculates distance instantly.
Without a target plate? Your laser beam just scatters in bright sunlight. Your device can’t see it. No reflection. No reading.
How to Position Your Target Plate
Place your tripod at the target location. Mount your target plate on the tripod. Adjust height so it’s visible from your measuring position.
Aim your laser at the center of the target. This is important. Dead center. Not the edge.
Keep the target steady. Wind can move it. Use guy wires or sandbags to stabilize. Your outdoor laser measurement depends on it.
Target Plate Alternatives
Don’t have a target plate? Use white poster board. Costs two dollars. Works almost as well.
Red duct tape makes a good marker. Tape a large X on white poster board. Aim for the center of the X.
Paint a white square on a board. Put it at your measurement endpoint. Aim your laser at the white area.
Even a white plastic bag works in emergencies. Not ideal. But better than nothing.
Why Target Plates Extend Your Range
A target plate can triple your effective measuring distance. Without one? You’re limited to 50-100 feet. With one? You can measure 200-300 feet outdoors.
This is because the reflective surface sends light directly back. The device sees a strong, clear reflection. Distance measurements work perfectly.
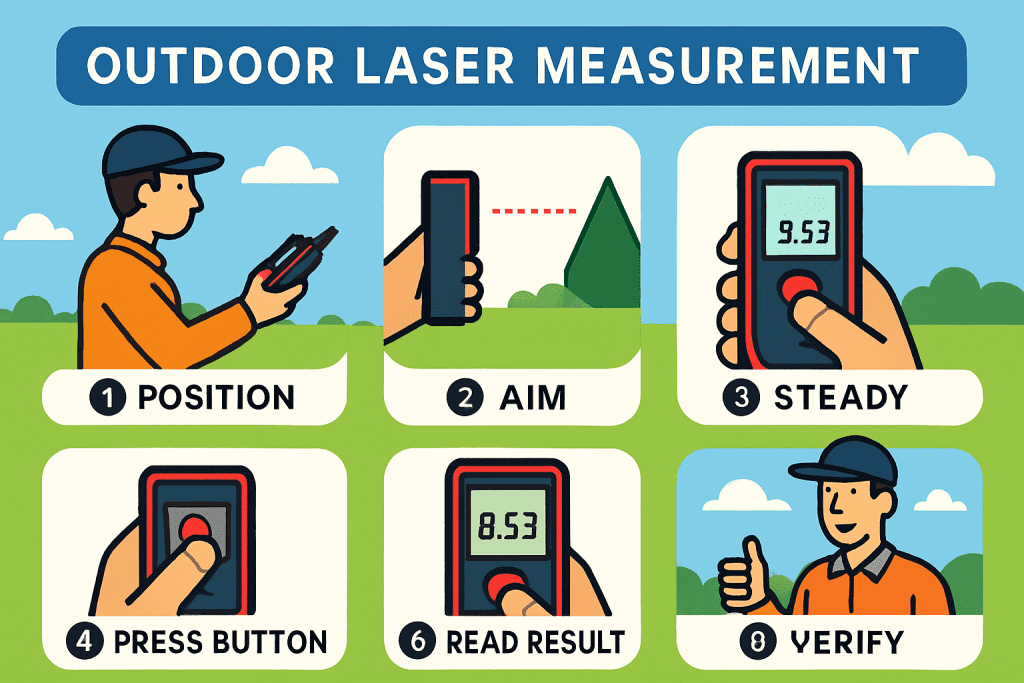
Step-by-Step: Measuring Outside Like a Professional
Time to measure How to Use a Laser Measure Outside . Follow these steps precisely. Your outdoor laser measurement will be accurate and reliable.
Step 1: Choose Your Measuring Time
Pick morning or late afternoon. Avoid midday sun. Check the weather. Make sure conditions are good.
Step 2: Prepare Your Equipment
Bring laser measure. Bring target plate. Bring tripod. Bring measuring tape. Bring notepad. Bring batteries. Bring sunglasses.
Check that your laser measure has fresh batteries. Test it indoors first. Make sure everything works.
Step 3: Set Up Your Target
Walk to the target location. Set up your tripod. Mount your target plate. Adjust height. Make sure it’s secure.
Position the target where you want to measure to. This becomes your endpoint. The distance to this target is what you’ll measure.
Step 4: Return to Your Starting Point
Walk back to where you’ll be measuring from. This is your baseline position. You’ll measure distance from here to your target.
Stand on level ground. Steady yourself. Hold your laser distance measurer with both hands.
Step 5: Aim Your Device
Look for the red laser dot. Find it on your target plate. The dot might be faint. This is normal outdoors.
If you can’t see the dot: Move to shade. Or measure during early morning. Or use a brighter target plate.
Once you find the dot, aim it at the center of the target. Dead center. This improves accuracy.
Step 6: Hold Steady
This is critical. Don’t move. Don’t shake. Hold your device flat and level.
For measuring over 50 feet, use a tripod. Mount your laser measure on a tripod. This eliminates hand shake. Your outdoor laser measurement becomes much more accurate.
Step 7: Press the Button
Push the measure button firmly. Wait for a beep. Your device will confirm when it gets a reading.
Sometimes it takes a second or two. The device is calculating. Don’t move while it works.
Step 8: Read Your Result
The distance appears on your display. This is your measurement. Write it down immediately.
Don’t trust your memory. Write the number. Also write the time. And weather conditions. And any notes about the measurement.
Step 9: Verify Your Reading
Take a second measurement. Aim again. Press the button again. Get another reading.
Do the two readings match? If they’re identical or very close (within one inch), you’re good. If they’re very different, something is wrong.
Possible issues: Wind moved your target. Device angle changed. Device wasn’t held steady. Try again.
Step 10: Record Your Data
Write down both readings. Note if they match. Calculate average if they differ slightly. Record the final measurement.
Take a photo of your target plate with the measuring device in the shot. This documents what you measured.
Measuring Outdoors in Real Situations
Let’s look at actual projects. See how outdoor laser measurement works in practice.
Measuring Your Property Line
Want to know exactly where your property ends? Use your outdoor laser measure.
Stand at one corner of your property. Set up target plate at the other corner. Measure the distance between them.
Take multiple measurements. Average them. Now you know your property line distance.
Do this for all four sides. You have complete property dimensions.
Your outdoor measuring accuracy tells you exactly what you own.
Measuring for a New Deck
Planning to build a deck? Measure the area first.
Place target plate at one corner of your planned deck. Measure from your starting point. Write this down.
Move to another corner. Measure again. Repeat for all corners.
Now you have all dimensions. You can calculate square footage. You know how much material to buy.
No guessing. No waste. Perfect outdoor laser measurement.
Measuring Your House Exterior
Real estate agents love this. Measure your house walls. Get accurate exterior dimensions.
Measure from corner to corner. Measure each wall length. Measure height from ground to roof.
Record all measurements. Calculate total square footage. You know your exact house size. Great for listings or appraisals.
Measuring a Fence Line
Need to replace your fence? Know exactly how much fencing you need.
Measure one corner to the next corner. Measure each section. Add them up.
Now you know total fence length. Order the right amount of materials. Your outdoor laser measurement saves money.
Measuring Distance to Obstacles
Is that tree close to your property line? Is that utility pole in your way?
Measure distance from your position to the obstacle. Your laser distance measurer tells you exactly.
No more guessing. No more surprises. Accurate outdoor measuring prevents problems.
Handling Tough Outdoor Conditions
Outdoor laser measurement challenges you with unique problems. Here’s how to overcome them.
Problem: Can’t See the Laser Dot
The sun is too bright. Your laser beam disappears.
Solution: Use a reflective target plate. This bounces light back. Your device sees it clearly.
Alternative: Measure during early morning or late afternoon. Sun angle changes. Laser dot becomes visible.
Another option: Move your target to a shaded area. Shade reduces glare. Dot becomes visible.
Problem: Wind Moving Your Equipment
Strong wind pushes your target plate. Your measurements change.
Solution: Use guy wires to stabilize your tripod. Tie it down to stakes. Add weight (sandbags) for stability.
Alternative: Measure during calm periods. Wait for wind gusts to stop. Take your reading in the calm.
Problem: Measuring Over Very Long Distances
Distance beyond 200 feet is tough. Even your laser measure struggles.
Solution: Use a reflective target plate. This extends your range. Can measure 300+ feet with good plate.
Alternative: Break the distance into segments. Measure part of the way. Then move forward. Measure the rest. Add the totals.
Problem: Dark or Reflective Surfaces
Your laser hits a dark wall. It gets absorbed. No reflection. No reading.
Solution: Place white poster board in front of the dark surface. Aim at the white board instead.
Alternative: Measure to an adjacent surface that’s lighter. Your outdoor laser measurement still works.
Problem: Sloped Ground
Your target is uphill or downhill. Your device is confused.
Solution: Measure the horizontal distance. Ignore the slope. Use math (if needed) to calculate true distance.
Alternative: Use a laser measure with slope mode. Some premium models automatically account for slopes.
Outdoor Measuring Accuracy: Getting It Right
Your outdoor laser measurement only works if you get it right. Here’s how to ensure accuracy.
Take Multiple Readings
Never trust a single measurement. Take at least two. Better yet, take three.
Average your readings. If you got 50 feet, 50 feet, and 51 feet, your average is 50.3 feet.
This accounts for small variations. Wind. Angle shifts. Device movement.
Check Your Aim
Make sure your laser is perpendicular to the target. Not angled. Straight on.
Angled laser beams give wrong readings. They measure the hypotenuse instead of straight distance.
Verify with Another Method
For critical measurements, double-check with traditional tape. Measure tape works over short distances.
This confirms your laser measurement. If both methods agree, you’re accurate.
Document Everything
Write down all measurements. Note the time. Record weather. Note any issues.
Later, you can review what worked and what didn’t. You learn from experience.
Common Mistakes to Avoid
Learn from others’ errors. Don’t repeat these mistakes.
Mistake 1: Forgetting the Target Plate
You think you can measure without it. You’re wrong. In bright sun, you’ll fail.
Always bring your target plate. Always use it outdoors. Don’t try to measure without one.
Mistake 2: Measuring During Harsh Midday Sun
Noon sun washes out your laser completely. You get frustrated. Readings don’t work.
Measure in morning or afternoon instead. Or choose cloudy days. Your outdoor laser measurement will succeed.
Mistake 3: Not Holding Steady
Your hand shakes. Your reading bounces around. Numbers don’t match.
Use both hands. Brace against something. Or use a tripod. Steady equipment equals accurate readings.
Mistake 4: Single Measurement Assumption
You measure once. You think you’re done. Later you discover it was wrong.
Always measure twice. Better yet, three times. Average the results. Accuracy improves.
Mistake 5: Ignoring Wind
Strong wind moves your target plate. You don’t notice. Your readings are wrong.
Stabilize your tripod. Use guy wires. Add sandbags. Secure everything before measuring.
Mistake 6: Poor Target Positioning
Your target plate is in shadow. You can’t see your laser dot.
Position target in light. Make sure laser dot is visible. Keep target at same height as laser.
Frequently Asked Questions
Can I measure outdoors in rain?
No. Wait for dry conditions. Rain creates reflection issues. Device can get damaged. Wet surfaces give bad readings. Postpone your measuring.
How far can I measure outdoors?
With target plate: 200-300 feet. Without target plate: 50-100 feet. Distance depends on sun angle, dust, and target quality. Professional models reach 400-600 feet.
What temperature range is safe for my device?
Most devices work between 50-95°F. Cold slows response. Heat damages components. Keep device in pocket until ready to use. Protect from extreme temperatures.
Do I need professional surveying equipment?
For most outdoor projects: No. A good laser measure does the job. For legal property lines: Maybe. Consider hiring a surveyor. They have certified equipment.
Should I measure in clouds or sun?
Clouds are better. No glare. No harsh shadows. Laser dot stays visible. You can measure all day comfortably. Sunny days work if you use a target plate.
Why do my measurements differ?
Common causes: Device angle changed. Hand shake during measurement. Target moved. Wind. Temperature change. Solution: Use tripod. Take multiple readings. Average them.
Can I measure moving water or objects?
No. Your device measures distance to stationary targets. Moving water reflects unpredictably. Moving objects shift position. Always measure to stationary endpoints.
Is outdoor laser measurement accurate enough for legal documents?
For casual use: Yes. For legal property surveys: Check with local authorities. Some jurisdictions require certified surveys. Professional surveyors use specialized equipment.
Conclusion: Master Outdoor Laser Measurement
You now know how to use a laser measure outside confidently. You understand the challenges. You know the solutions. You have a step-by-step process.
Start with simple measurements. Measure your driveway. Measure your lot. Build your confidence.
Progress to bigger projects. Measure property lines. Plan decks and patios. Tackle your vision.
Remember the key rules: Use a target plate outdoors. Measure during early morning or late afternoon. Take multiple readings and average them. Hold your device steady. Verify critical measurements.
Your outdoor laser measurement will be accurate. Your projects will be successful. Your measurements will be professional.
Get out there. Measure your property. Plan your next project. Your laser distance measurer is ready. You’re ready too.