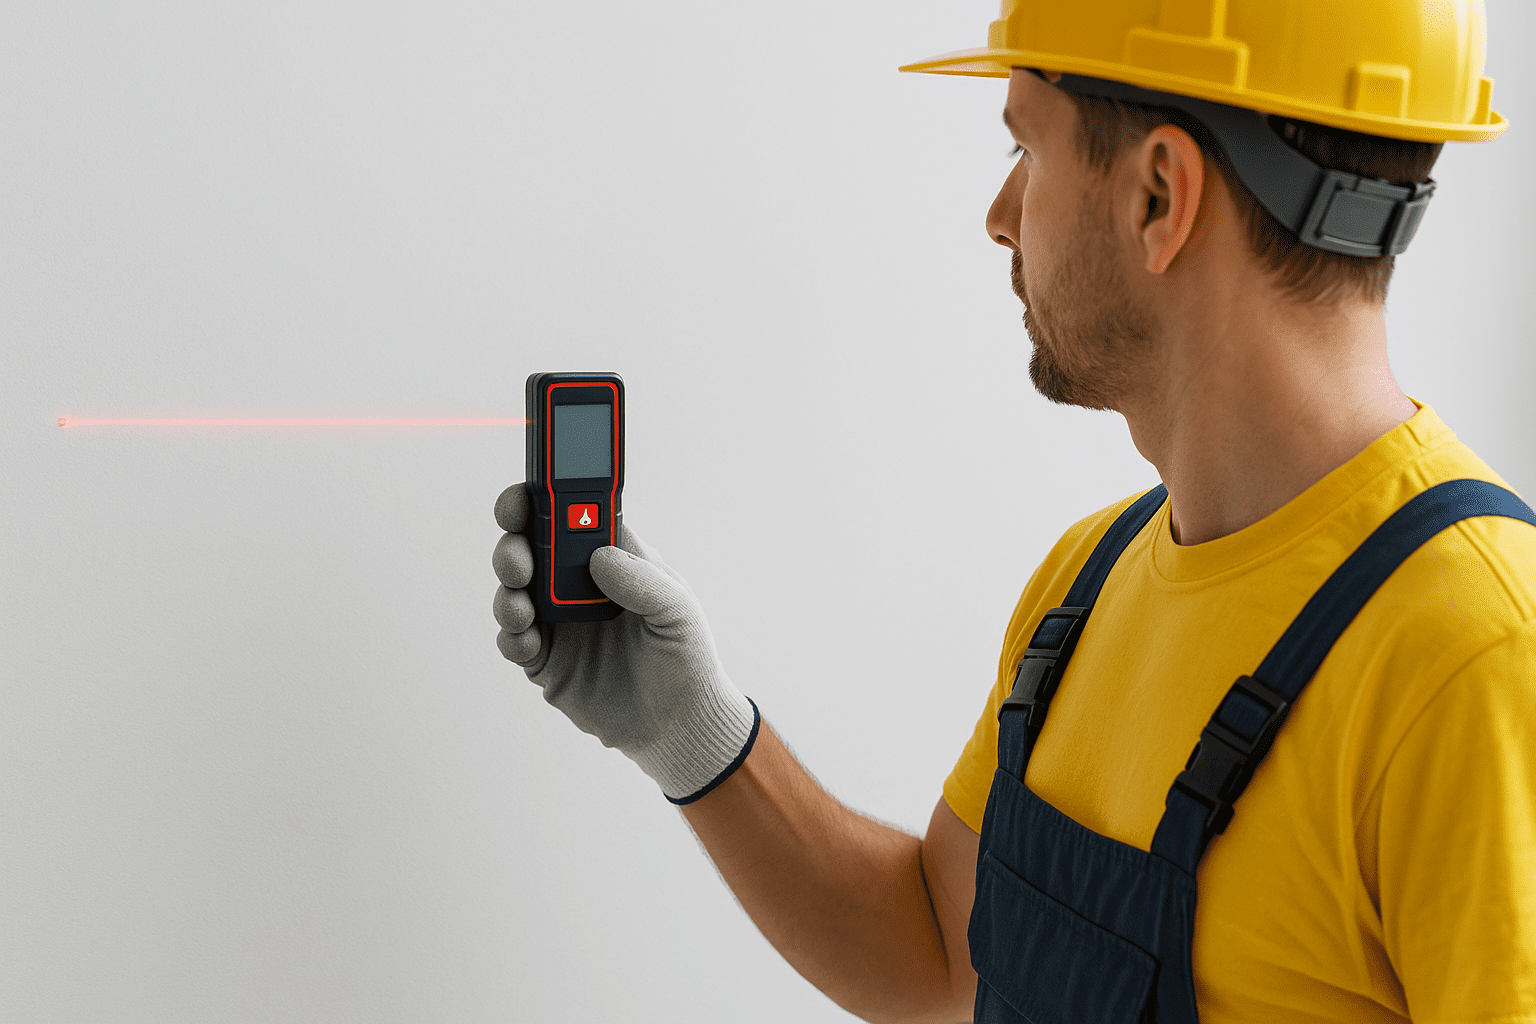
Measuring is part of almost every project, whether you are a builder, homeowner, architect, or DIY fan. We all know the classic steel tape—long, heavy, sometimes stubborn and never quite long enough for big jobs. Today, there’s an easier way. The laser tape measure makes it possible to get accurate measurements in seconds with just one hand and push of a button. This tool is now common on job sites, in workshops, and even in kitchen drawers.
This article explains how a laser tape measure works, what benefits it offers, and how you can use one correctly. Every section is written to be easy to read and understand, using short sentences and simple words. Let’s see how this light-powered tool makes your work easier and faster.
What is a Laser Tape Measure?
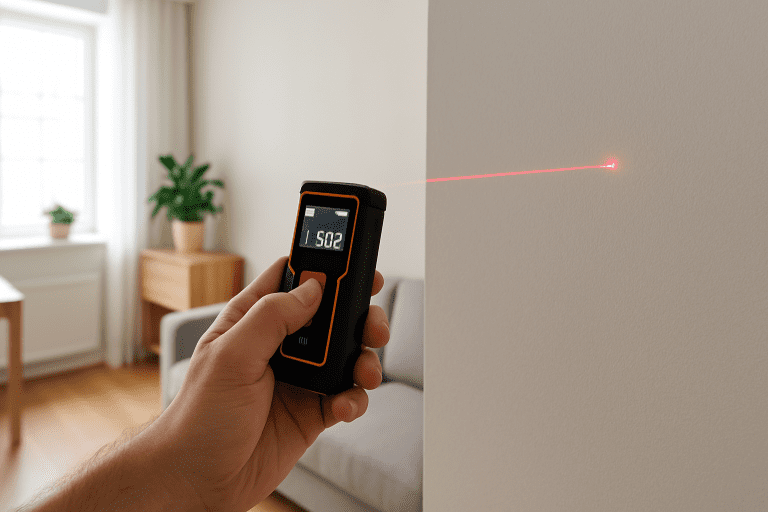
A laser tape measure is a handheld device. It looks like a small gadget, not much bigger than your palm. Instead of a metal tape, it uses light—a laser beam—to find out how far away something is. To use it, you just aim the device at a wall or object, press one button, and in less than a second, the distance shows up on the screen.
This tool is easy to carry. It fits in your pocket or bag. People use these in building sites, making furniture, planning room layouts, measuring windows or ceilings, and much more.
Main Benefits
Laser tape measures offer big advantages:
How Does It Actually Work?
Every laser tape measure uses a tiny but powerful red laser beam. This is a focused line of light, like a small dot you see on your target. The device sends this beam out, bounces off the object, and comes back to a sensor inside the tool. The tool’s computer checks how long the beam takes for this “round-trip” journey.
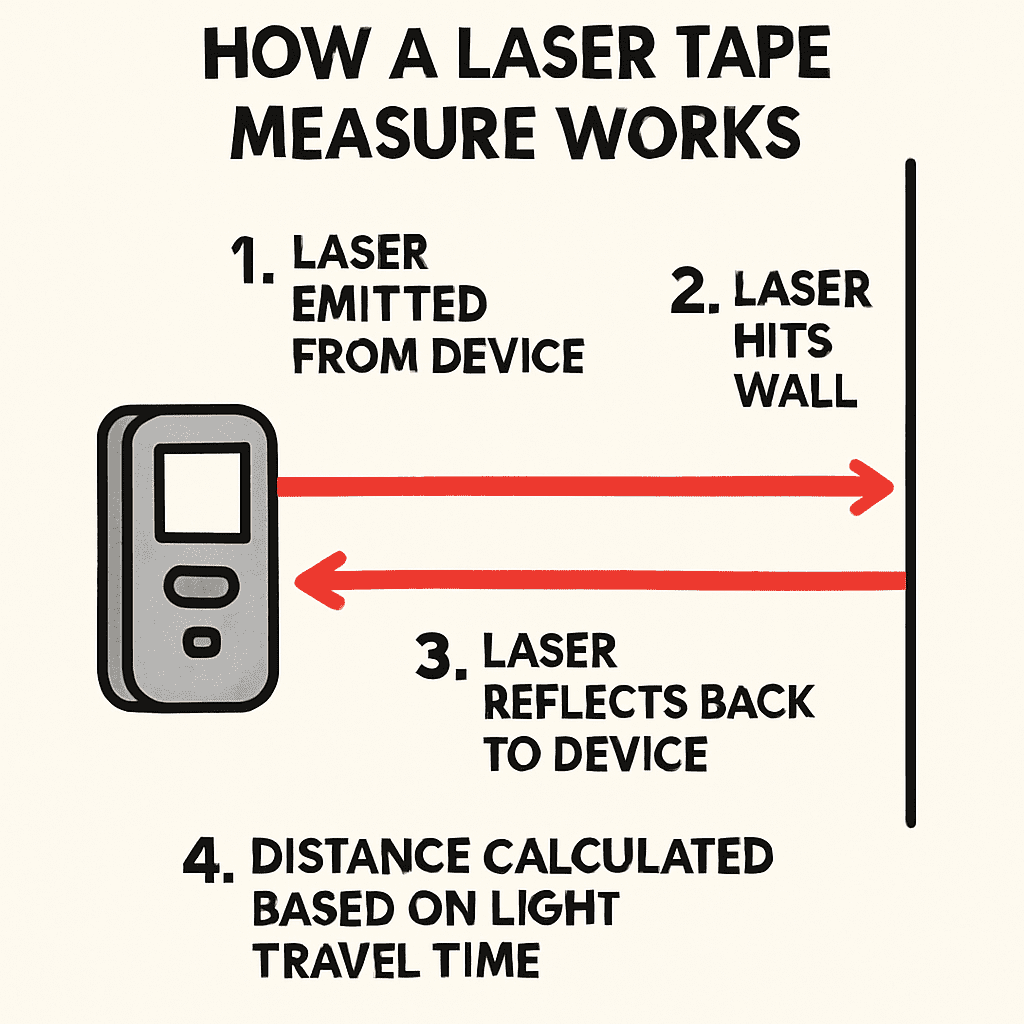
Infographic showing how laser tape measure technology works with light beam paths
There are two main methods inside these laser tools:
Time-of-Flight Method
This is the most common way. Here’s how it works:
This method is used for longer measurements, even outdoors. Some devices measure up to 600 feet (almost two football fields in length).
Phase Shift Method
This is a little different:
This approach gives very fine accuracy (as little as one-sixteenth of an inch). It’s used more indoors or when you need the closest measurements.
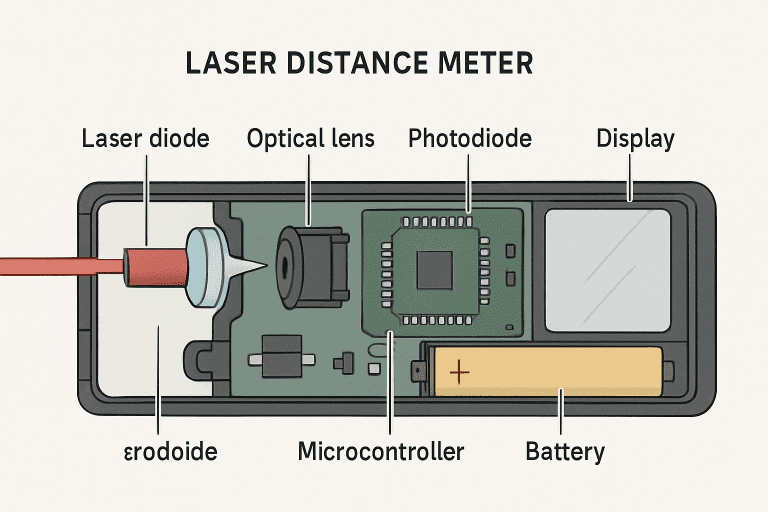
Key Parts of a Laser Tape Measure
Every laser tape measure has these main parts:
- Laser Transmitter – This part fires the beam of light.
- Light Sensor (Detector) – This sees the light when it comes back and turns it into an electrical signal.
- Processor – This is like the brain. It does the math, finds the distance, and controls extra features.
- Screen and Buttons – The display shows your result clearly. Buttons let you switch modes—distance, area, volume, or memory. Most screens are backlit for reading in dark spaces.
- Body and Protection – The plastic or rubber case keeps the parts safe from drops and dust.
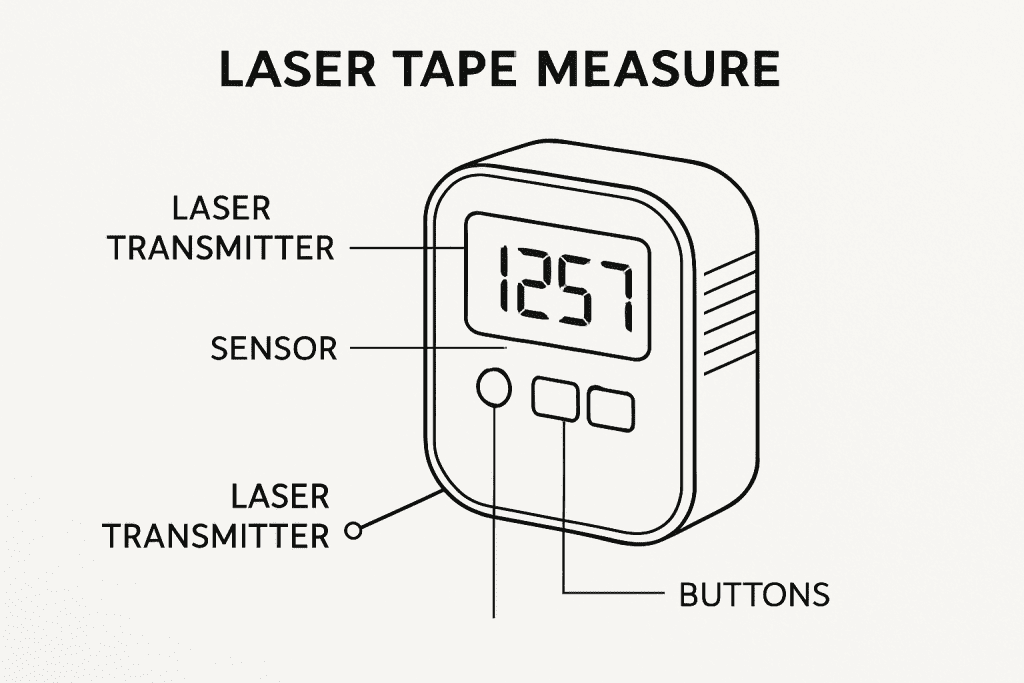
Detailed diagram showing key components inside a laser tape measure
Knowing these makes it easier to use and troubleshoot your device if something goes wrong.
How to Use a Laser Tape Measure: Step-by-Step Guide
Using this tool is simple if you follow these steps:
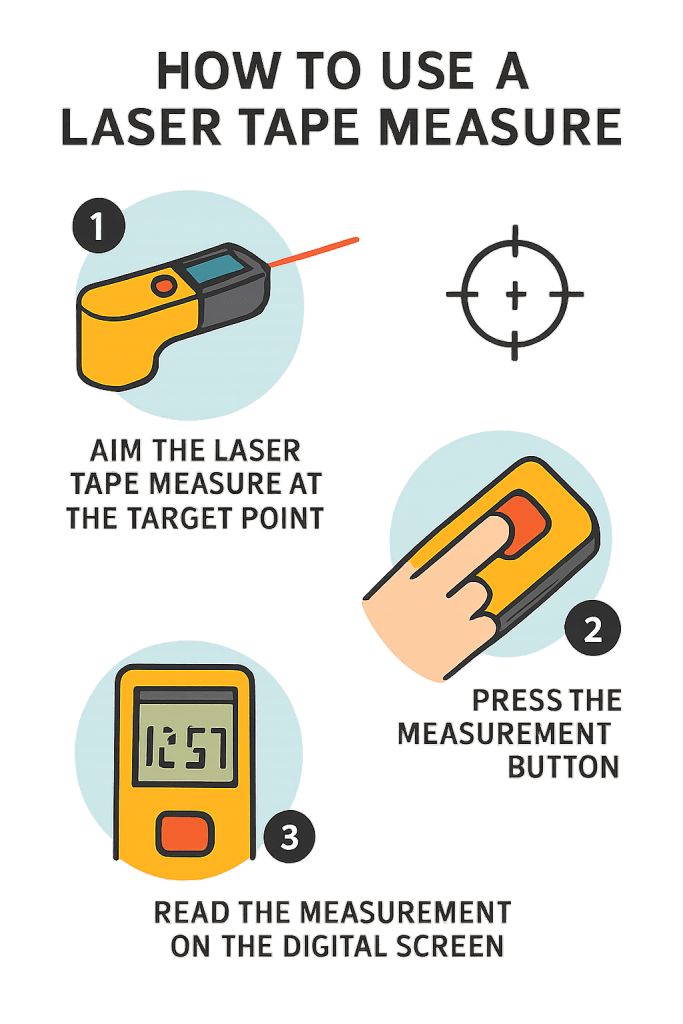
Step-by-step visual guide for using a laser tape measure correctly
- Turn It On
- Check Modes
- Set Your Reference Point
- Aim the Laser
- Take the Reading
- Check the Result
- Record or Save Values
- Turn Off and Store
Accuracy and Range Explained
Not all laser tape measures are the same. Basic models can measure up to 100 feet with an accuracy of about 1/8 inch (3 mm). Middle-range models go up to 300 feet, with even tighter accuracy—around 1/16 inch (1.5 mm). Top-tier devices for pros can work over 600 feet, sometimes with accuracy to 1 millimeter!
In the real world, results can change if:
For the best results, point the tool straight at the target, use a tripod for long distances, and aim for surfaces that are not too glossy or dark.
When Should You Use a Laser Tape Measure?
Laser tape measures are great for:
Laser vs Traditional Tape: Quick Comparison
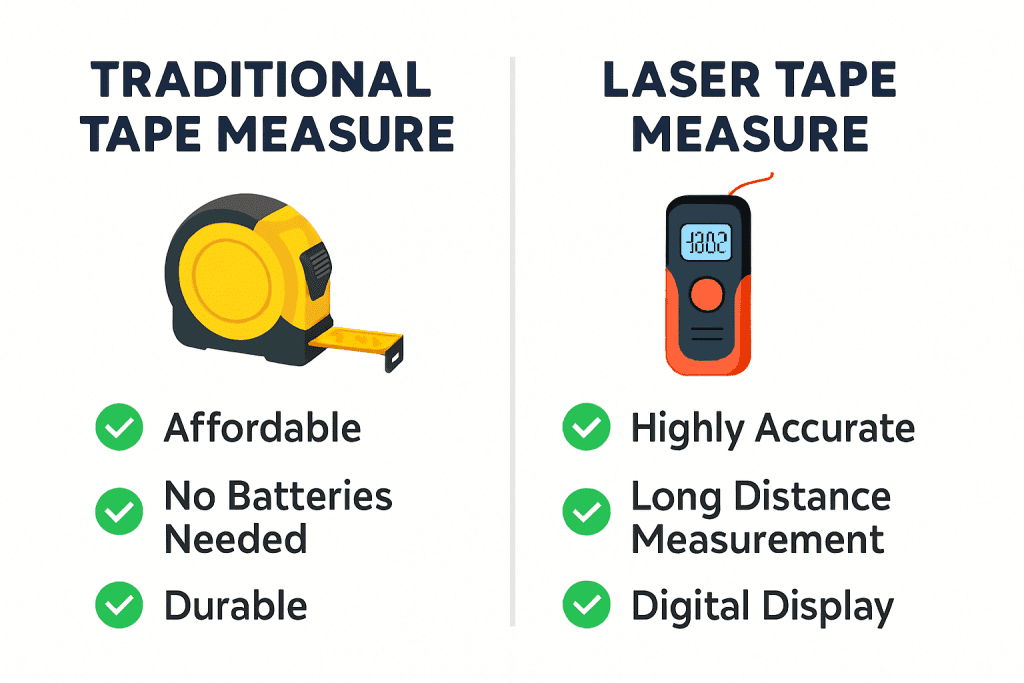
Comparison between traditional tape measures and modern laser tape measures
Classic tapes still work well, especially for short jobs, curved surfaces, or old-school folks who like analog. But for speed, convenience, and long lengths, laser beats tape every time.
Tips for Best Results
Safety and Care
Laser tape measures are safe to use, but always:
Clean the lens with a soft, dry cloth. Replace batteries as needed, and check for accuracy every few months with a known distance (like a 10-foot floor mark).
Troubleshooting Common Problems
Problem: No reading, or display error
Solution: Check battery, clean lens, remove objects between tool and wall.
Problem: Inconsistent numbers
Solution: Hold tool steady, aim straight, use a flat target.
Problem: Shorter range than expected
Solution: Try a whiter (brighter) target, avoid bright sunlight, change batteries.
If all else fails, read the manual or contact support—most have guides for common error codes (like E1 or E2).
How to Pick the Right Model
Check that the tool has a warranty and is rugged (for job sites).
Frequently Asked Questions
Q1: Do laser tape measures work outside?
A: Yes, but very bright sun can make readings harder. Use a white card as a target for best results.
Q2: Are they safe?
A: The lasers used are low-power, and accidental brief exposure is not dangerous. Never stare into the beam.
Q3: Can it measure area or volume?
A: Yes! Many models let you measure the length and width (for area) or add height (for volume).
Q4: Are they better than tape measures?
A: For almost all jobs except for very short, curved, or cluttered spaces, laser tape measures are faster, easier, and just as accurate.
Conclusion
A laser tape measure helps make measuring quicker, easier, and safer. With clear screens, simple buttons, and light beams that reach as far as a football field, almost anyone can use one. Use the tips here to pick the right model, practice safe use, and get the most out of your tool. Now, every project—from home fix-ups to construction jobs—just got a lot simpler.